2. Secure the toggle board in its lower position, for maximum throw of the toggle.
3. Place the shaft in the bearings, with the tip against the tip stop and the middle bearing block in the "bearings" position.
4. Add a strip of masking tape around the shaft, directly under the shaft marking guide. The easiest way to do this is to place the end of the tape against the shaft, then wrap it on by spinning the shaft in the bearings.
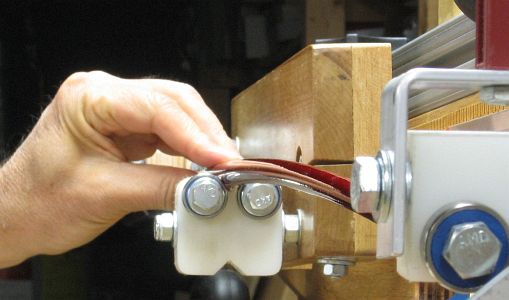 5.
Use the toggle clamp to load the shaft. The now bent shaft will rotate
to the nearest NBP -- "snap" is probably a more apt description than
"rotate".
5.
Use the toggle clamp to load the shaft. The now bent shaft will rotate
to the nearest NBP -- "snap" is probably a more apt description than
"rotate".6. Using your fingers, rotate the shaft a full turn. You will notice that it will take some effort to turns the shaft in some orientations, and in others you will have to restrain the shaft from running away from you. The shaft clearly "knows what positions it likes."
This full turn is sort of a preliminary scan of the shaft, to see what you have. A Type 2 shaft has two favored positions opposite each other, and has two "bumps" that are hard to turn the shaft through. The favored positions are the NBP directions, and the bumps are the spine directions.
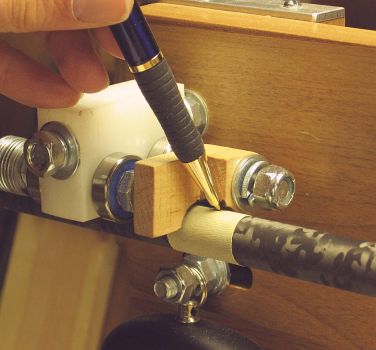 7.
Slowly move the shaft through another full turn, recording your
findings directly on the shaft. As shown in the photo, you can use the
marking guide to make a mark on the masking tape at the exact top of
the shaft. So orient the shaft at an N or S and make the mark, then
label it "N" or "S". (Charlie Badami uses fine-point colored markers,
and uses a color-coding for N and S -- so he never has to actually
write letters on the tape.)
7.
Slowly move the shaft through another full turn, recording your
findings directly on the shaft. As shown in the photo, you can use the
marking guide to make a mark on the masking tape at the exact top of
the shaft. So orient the shaft at an N or S and make the mark, then
label it "N" or "S". (Charlie Badami uses fine-point colored markers,
and uses a color-coding for N and S -- so he never has to actually
write letters on the tape.)It is worth noting how to orient the shaft:
- For an NBP, allow the shaft to snap to position. Typically there will be a "dead space" of 10º to 30º, depending on the size of the spine. (If the dead space is 30º or more, you probably don't have a spine worth aligning -- but that just my opinion.) Feel-find the edges of the dead space, then orient the shaft in the middle of it. Mark the shaft while you hold it in this position.
- For a spine, turn the shaft until you feel the "top of the bump". Now try to find spot near the top where your fingers require minimum effort to hold the shaft in position; it doesn't want to spin either way -- though you know it will as soon as you let go. So don't let go until you have marked the position.
I can't describe it any better in words and pictures. You just have to try it until you get the feel. I guess that's why it's called "feel finding".