The Golf Digest Article
Dave Tutelman -
June 19, 2017
I appeared in a story in the July 2017 issue of Golf Digest. Of course,
a lot of my friends were amazed and thrilled and full of
congratulations. There were also a lot of questions. Most of them
boiled down to either (1) how did this come about, or (2) what am I
looking at in the picture. So here is the backstory, to answer those
questions.

Click picture
for full-size image
In
the course of the interview, Mike found out that I have been doing my
own clubmaking since the 1980s, and we spent an hour and a half talking
about the "movement". Next thing I knew, Jennifer Aborn, the visuals
editor for Conde Nast (the parent company of Golf Digest), was making
an appointment for a photographer to visit my basement workshop for
some pictures.
Toward the end of April, Nathaniel Welch and his
assistant showed up on my doorstep with a coffin's worth of photograpic
equipment. It took both of them more than one trip to get it down to
the basement. I was impressed to see how a real, professional
photographer works. (More on that below.)
By mid-May, Kathy
Stachura -- who serves as Mike's fact-checker -- had called me to
review the things about me that Mike was going to say in the article.
They were just fine for accuracy, but two things came out that had me
worried. The article would appear in the issue that comes out in early
June (the July issue), and it would mention my Club Design
Notes,
my e-book tutorial for club fitters and custom clubmakers. Why
did
this worry me? Because almost half the pages in the e-book had not seen
an update since 1998, almost 20 years ago. We have learned a lot since
then, and if Golf Digest readers were about to receive a recommendation
for it I did not want them to get obsolete information. I spent the
next two weeks updating the old pages. Now it says what I would say if
asked today -- except for the chapter on shaft flex, which needs a
complete overhaul. Whew!
The issue and the article came out the
second week of June, and Mike was kind enough to send me a couple of
complimentary copies. (My sons thank you, Mike.) The article was part of
a collection of Do-It-Yourself articles. In addition to DIY clubmaking,
there were DIY practice greens, DIY swing instruction, and even DIY
golf simulators! There were sidebars on how to make your own head
cover, swing speed training aid, and Sunday carry bag. All in all, a most
enjoyable series.
The one on DIY clubmaking was well
done IMHO. There was a lot left unsaid -- but how much can you say in
just one page of print? I thought Mike did a fine job of capturing the
essence of what I had to say (and, presumably, the other three guys he
talked to). Everything in the article rang true, even if it only
scratched the surface.
The photo, and DIY clubmaking tools
I
was amazed to find opposite the article a full-page picture of me in my
workshop. For whatever reason, Nat (the photographer) or the editors chose a picture that
had a lot going on. I suppose they wanted to show a bunch of tools that
I use. It looks great -- unless you know enough about golf clubs to try
to identify everything. Then it looks kind of cluttered. Bear in mind,
I'm not just a
DIY clubmaker, I'm a DIY toolmaker and instrument designer as well. And
Nat managed to take pictures of me with many of my self-designed and
-made clubmaking tools and instruments. The picture in the magazine
includes
four of those.
So, for those who might be interested, I have
highlighted them in the photos below, and included links to my pages
that tell more about them. In most cases, the linked page includes instructions to build
and use it. |
In this photo, my digital swingweight scale is highlighted. Here's a
better picture of the scale, from my article on how you can
build your own. |
Nat took some pictures of me removing a head from a shaft with a torch using my DIY shaft
puller. I was hoping the pictures would come out well, because they
showed me doing something real in the shop. Why were they not used? Maybe it was the safety
glasses. (Yes, I follow the safety rules, all the time. And Nat had no
intention of taking pictures of me violating safety rules -- more power
to him.) Anyway, I have complete plans for the shaft puller on my web site. |
My primary shaft measurement instrument is the NeuFinder, which Dan Neubecker and I designed in 2004. The picture on the
right is a model 4.0; the one Nat photographed in my workshop is the
newer model 4.1. The difference is the digital scale readout, visible
in both pictures as different. I don't have DIY details on the
NeuFinder, because Dan and I are part of a small partnership that
charges for the plans. |
Though
I use the NeuFinder for most of my shaft trimming and all my shaft
profiling, many independent clubmakers still use frequency to measure
the flex of a shaft. My
own frequency meter
dates back to 1996, when it was the latest and greatest, and not many
shops had them yet. Being an electronics engineer (my Bachelors and Masters
are both in EE), I designed all the electronics for it as well as the
clamping arrangement and the sensors. |
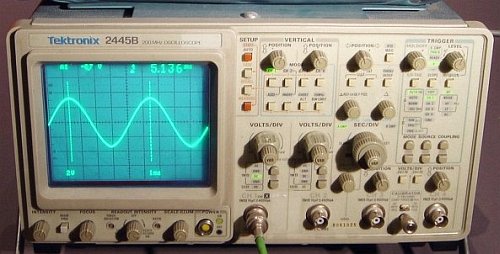
Wait!
Isn't that an oscilloscope on the workbench shelf? It sure is.
Remember, this workshop has to support all my hobbies, not just golf technology. As an EE, electronics
is another of my hobbies, hence the o-scope. It was state-of-the-art in
the 1980s, and still serves my purposes fine. Nat thought it was cool,
and
wanted it in the picture And I did refer to it
in my article on shaft FLO.
Nat
couldn't fit all my DIY clubmaking tools in the photo. Good thing, too;
it would have been even more cluttered. So not shown is my instrument
to measure shaft EI
(a more precise but specialized way to profile a shaft) nor my hosel reaming fixture.
But if you look closely, you will see a couple of tools not of my
manufacture; a butane mini-torch for pulling shafts and even a corner of a
Scotland loft/lie machine are peeking out from behind me.
|
Watching a pro photographer at work
I have been into photography since about 1951, when I was ten. By
the time I was in high school, I was using a Rolleiflex camera
and Weston Master II exposure meter. No automatic focus or exposure
back then; it was manual everything. I also developed my own film and
printed/enlarged my own photos. I have grown through 35mm SLRs and into
digital photography. I'm still a serious hobbyist. I do most of
the
photography and all the post-camera image processing for this web site.
So it was fascinating to watch a pro at work. As in most things, an
advanced amateur may think he knows everything (no, I'm not that
headstrong, but it is hard not to be), but a real pro will put
him in the shade. Here are a few of the things I noticed that set Nat
apart from the best amateur photographers I know:
- He worked from a plan. Please understand that this was
a challenge for a non-clubmaker. How would he know what pictures he
wanted, given that he knew nothing about clubmaking. So he spent the
first 20-30 minutes getting a demo of things a clubmaker does, and
asking enough questions to understand some of the considerations. He
saw the loft/lie machine and bending bar, with a club in it. He watched me
check a shaft's flex on the frequency meter, on the NeuFinder, and on the EI
machine. He watched me pull a clubhead off a shaft, measure the
swingweight of a club, and even ream a hosel. (Well, I didn't actually
remove steel; the hosel was already the right size; but I mounted
everything and ran the drill press.) Only after all this did he come up
with a set of shots he wanted to take, and then the plan -- lighting
and angles -- to get them.
- The right equipment. Amateurs, at least those who
think budget is the measure of how advanced you are, want the "best"
equipment. Nat had the right
equipment for the job. I'm not saying what he had was not expensive.
The lighting he brought probably cost as much as all the cameras I've
owned over my lifetime. But it was less a matter of snob appeal and
more a matter of "this will do the job reliably and well." I found it
interesting that he did not bring a tripod, if you don't count the
light stands. He knew it would be cramped quarters in the basement
workshop, and he had enough light so hand-holding would not be a
problem.
- Complete control over light. Not just a sense of lighting, which any good photographer must possess, but the wherewithal --
equipment and knowledge -- to change the lighting to make it what he
wanted. He had two remote strobes, one with a radio trigger
from the camera and the other a slave flash. (At least that was my
understanding; it's possible they were both radio triggered.) For each,
he had umbrella reflectors, filters (density and tone), and other stuff
I can't remember or wouldn't understand. Each had a modeling light, and
he used it for a preview. But he didn't just trust the modeling light.
He took the picture with camera and flash, and viewed the lighting on
the camera's screen; these pictures were intended
to be deleted. This is in opposition to the amateur taking lots of
pictures hoping one will turn out. Nat took intentional throw-aways
before he even started to pose me, just to see what the light and the
angles looked like. Only then did he take the expected bunches of
pictures.
- He didn't just have
the right equipment; he knew
how to use it. This is not as trite as it sounds. I have a
Nikon bridge camera that I use for most of my photography. The user's
manual is 260 pages. I probably use only 30% of its features. But even
that isn't the big difference. Except for the bare minimum features
that I use all the time, I have to think about what to do next; it's not instinctive. For
many of them, I even have to look them up in the manual to refresh my memory. If I'm going on a
shoot where I expect to use a feature I don't often use, I may even
practice before the shoot. Nat
just knows his camera and lights. He doesn't have to think
about what he is doing; his fingers know where to go and what to do. As
someone who used to play semi-pro piano, I think of what Nat does in
the same way. My own fingers only know a small part of my complicated
camera. Nat's fingers know every feature he uses, so his mind can focus on the composition of the picture he wants.
I'm sure there is more, but those were the lessons I learned from
watching him. And an impressive lesson it was.
|
So now go read the article yourself. Golf Digest, July 2017, pp. 64-65. It's also (a month after the magazine was distributed in paper) available online.
Last modified 7/7/2017
|