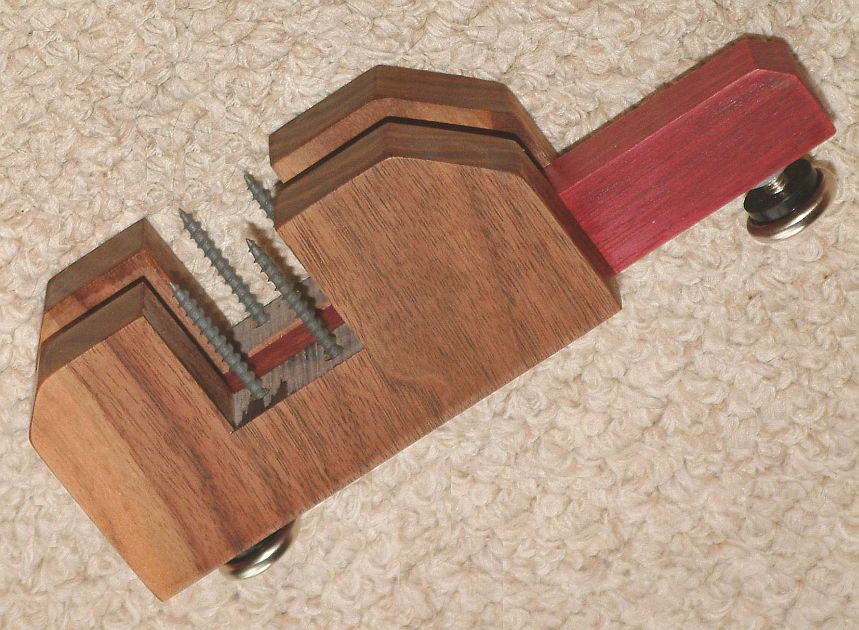
 The legs are composed of two basic components that you will eventually
glue together with wood glue, and when dry, will attach to the backer
board with long screws from the bottom.
The legs are composed of two basic components that you will eventually
glue together with wood glue, and when dry, will attach to the backer
board with long screws from the bottom.
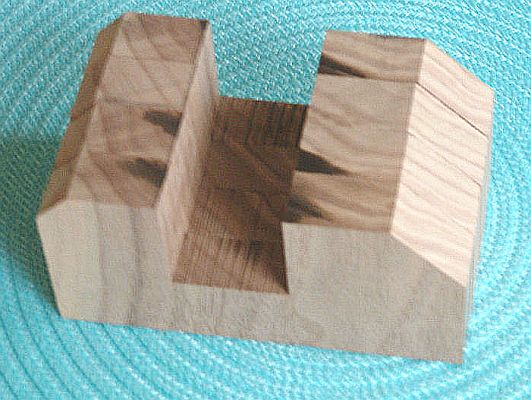
Once all the basic block shapes are cut you will next want to cut the
notches in the leg supports. These notches fit over the backer
board and should be a light press fit. Before you make any cuts,
you should measure your backer board to determine it’s actual
width. It is common for ¾” plywood to actually be 23/32”
and double that width for the backer board gives you about 1-7/16”,
rather than the 1-1/2” you might expect. So, if you cut the
notches 1-12” wide, they will be much too big. You should
creep up on the final size you need for the notch width as you cut the
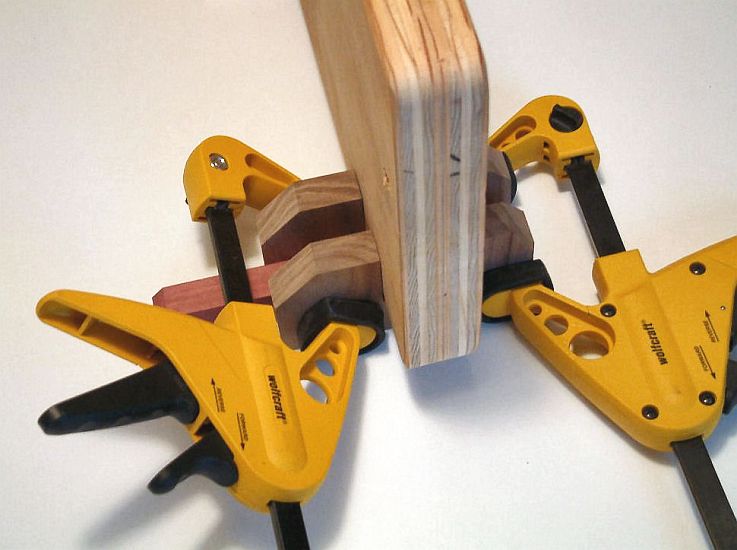
notches so you don’t cut them too big.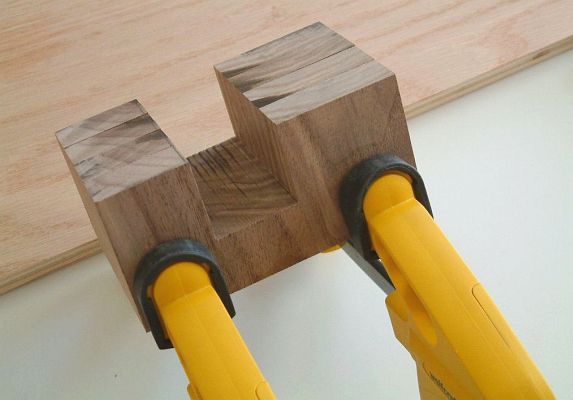 To cut the notches evenly, consistently and quickly, clamp all four raw rectangular blocks together with quick
clamps, placed in a manner so that they can firmly hold the four leg
supports, while allowing you to run them through the table saw to cut
the notches, as shown in the photo. You will be cutting all four of them at once this
way. You may have to change one of the clamp positions as you
make the cuts.
To cut the notches evenly, consistently and quickly, clamp all four raw rectangular blocks together with quick
clamps, placed in a manner so that they can firmly hold the four leg
supports, while allowing you to run them through the table saw to cut
the notches, as shown in the photo. You will be cutting all four of them at once this
way. You may have to change one of the clamp positions as you
make the cuts.To make the notch cut, you can use a regular saw blade and make numerous cuts or a dado blade and make just a few cuts. The depth of the blade will determine the depth of the notch; so set your blade depth to match the plan dimensions. It is always a good idea to test this height by cutting a test in a scrap piece and measuring the cuts depth, then adjusting until you get the final depth just right. Once the depth is set, start by making the cut on one side of the notch at the dimension shown on the plans. The dimension to the other side will float, temporarily. Now make the cut on the other side of the notch at least to allow for a 1-3/8” gap. Next, cut away all the wood remaining between the two cuts. |
|
Now, check the notch width against the backer board for fit. You
are shooting for a snug, but easy press on fit. Ideally is would
be just tight enough to stay on the backer board if you let go of it,
but not so tight you have to work hard to get on, as this could split
the wood. If your measurements were correct, the notch should
still be a little too small. Now move you rip fence in
approximately 1/32” increments and cut a little more each time,
checking for fit with the backer board between each cut. After a few
cuts, you should get the fit you are looking for. |
 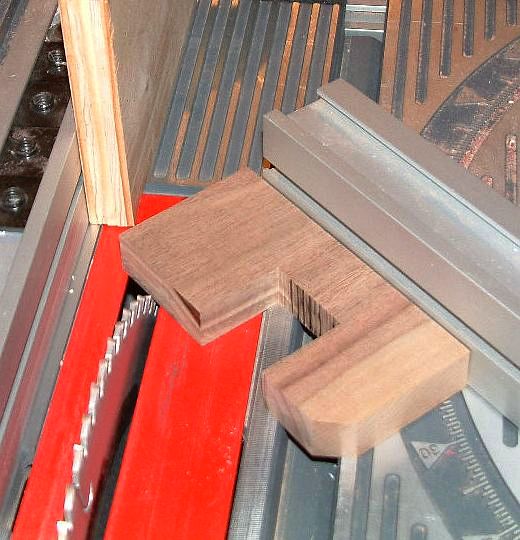 With the support leg notches are complete, you can cut the 45-degree
angles on the leg supports. It is best to unclamp the pieces for
the angle cuts. There is an easy table saw trick to getting them
all the same. Start by setting your miter guide to 45
degrees. Now clamp a spacer wood piece against your rip fence,
but well short of the blade itself. You use the spacer to
set the position of the piece relative to the blade, but as you push it
toward the blade, it disconnects from the spacer, yet does not touch
the rip fence, therefore it will not bind. You
adjust the overall positions of the rip fence relative to the blade to
accomplish different depth angle cuts. You might want to
experiment a bit with a scrap piece until you are sure you are getting
the angle depth you want.
With the support leg notches are complete, you can cut the 45-degree
angles on the leg supports. It is best to unclamp the pieces for
the angle cuts. There is an easy table saw trick to getting them
all the same. Start by setting your miter guide to 45
degrees. Now clamp a spacer wood piece against your rip fence,
but well short of the blade itself. You use the spacer to
set the position of the piece relative to the blade, but as you push it
toward the blade, it disconnects from the spacer, yet does not touch
the rip fence, therefore it will not bind. You
adjust the overall positions of the rip fence relative to the blade to
accomplish different depth angle cuts. You might want to
experiment a bit with a scrap piece until you are sure you are getting
the angle depth you want. |
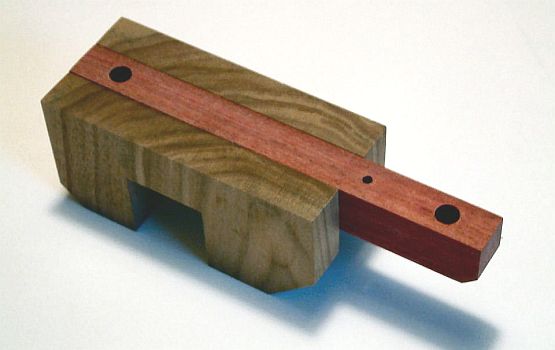
 When you are done, here is what the stack of leg supports will look like. |
  Once all the angle cuts are complete you need to glue the leg supports
and the legs together.
Once all the angle cuts are complete you need to glue the leg supports
and the legs together. |
 One
of the best methods
to do this squarely is it to take two scraps of plywood and screw them
together to make a simulated backer board. Be sure you use the same
kind of plywood that you used for the backer board; not all plywood
that is nominally 3/4" is actually the same thickness. (I used
part
of an old backer board from a previous prototype for my leg glue
setup). You can use this as a template to assemble, glue and clamp the
legs and leg brackets together. Once you get the parts clamped
together, you can remove them from the makeshift backer board and wipe
off any excess glue and let dry. One
of the best methods
to do this squarely is it to take two scraps of plywood and screw them
together to make a simulated backer board. Be sure you use the same
kind of plywood that you used for the backer board; not all plywood
that is nominally 3/4" is actually the same thickness. (I used
part
of an old backer board from a previous prototype for my leg glue
setup). You can use this as a template to assemble, glue and clamp the
legs and leg brackets together. Once you get the parts clamped
together, you can remove them from the makeshift backer board and wipe
off any excess glue and let dry. |
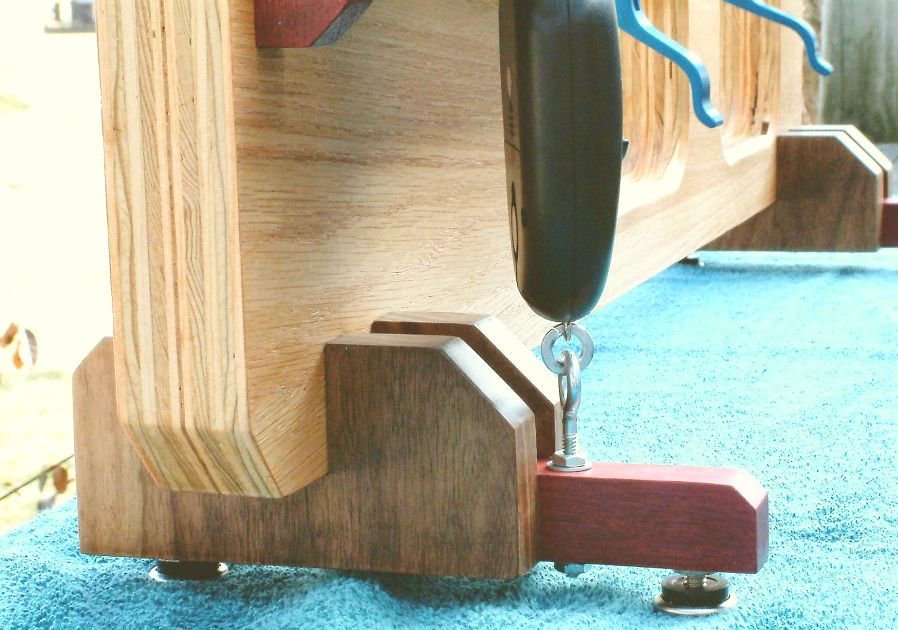
 After allowing the glue to dry, drill all the holes called for in the plans with a drill
press.
After allowing the glue to dry, drill all the holes called for in the plans with a drill
press.Note: Do not drill the eyebolt hole for an NF-4.1. It -- and the eyebolt and fishing scale shown in the photo -- is not part of the 4.1's newer design. You are ready to install the hardware into the legs and the legs onto the backer board. |